There are many ways to use Google Forms. A Google Form is a great tool where you can create a form for customer feedback, research a topic and then share the results with your team, or ask students to participate in an online survey.
How to Print a Google Form
This article will guide you through how to print Google Forms if you need any hard copies or your form in PDF format. Note that this only prints or downloads forms with empty fields. Step 1: Go to Google Forms and create a Google form. Follow the on-screen instructions to sign in. Make sure you use the same login info you used to create the form.
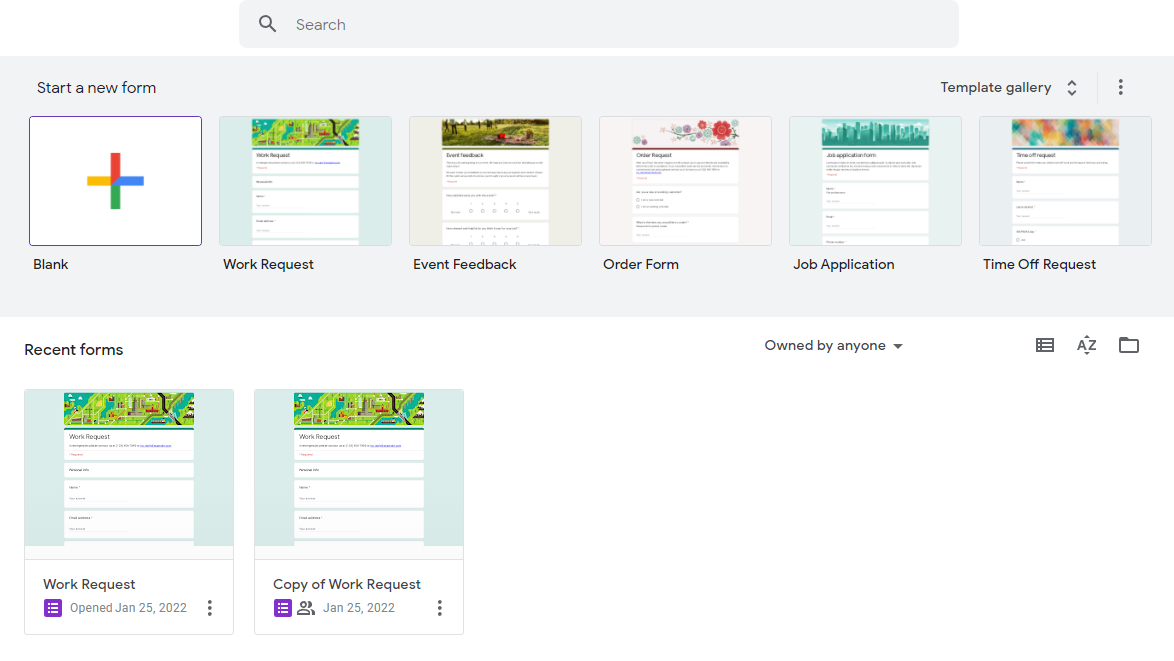
Step 1: If you want to create a new Google form, it is easy and quick. Log in with a blank template, or choose a Google Form template available in your Template Gallery. Click Template Gallery in the top right corner to find the templates.
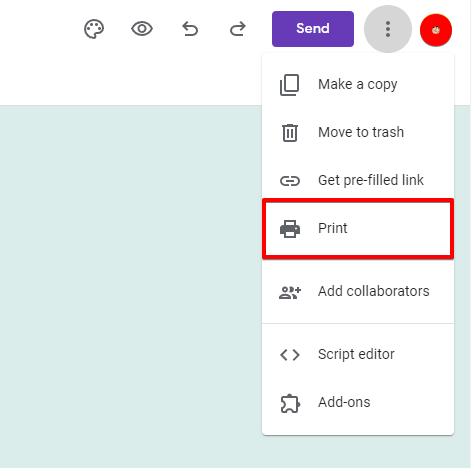
Step 2: Once you have created the form and it is ready, click the three dots positioned on the right side of your form. Here, you will find additional options.
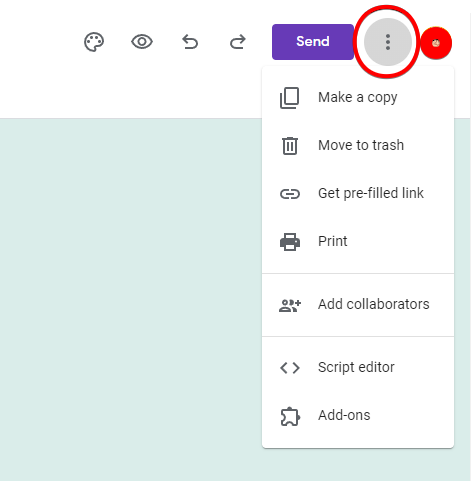
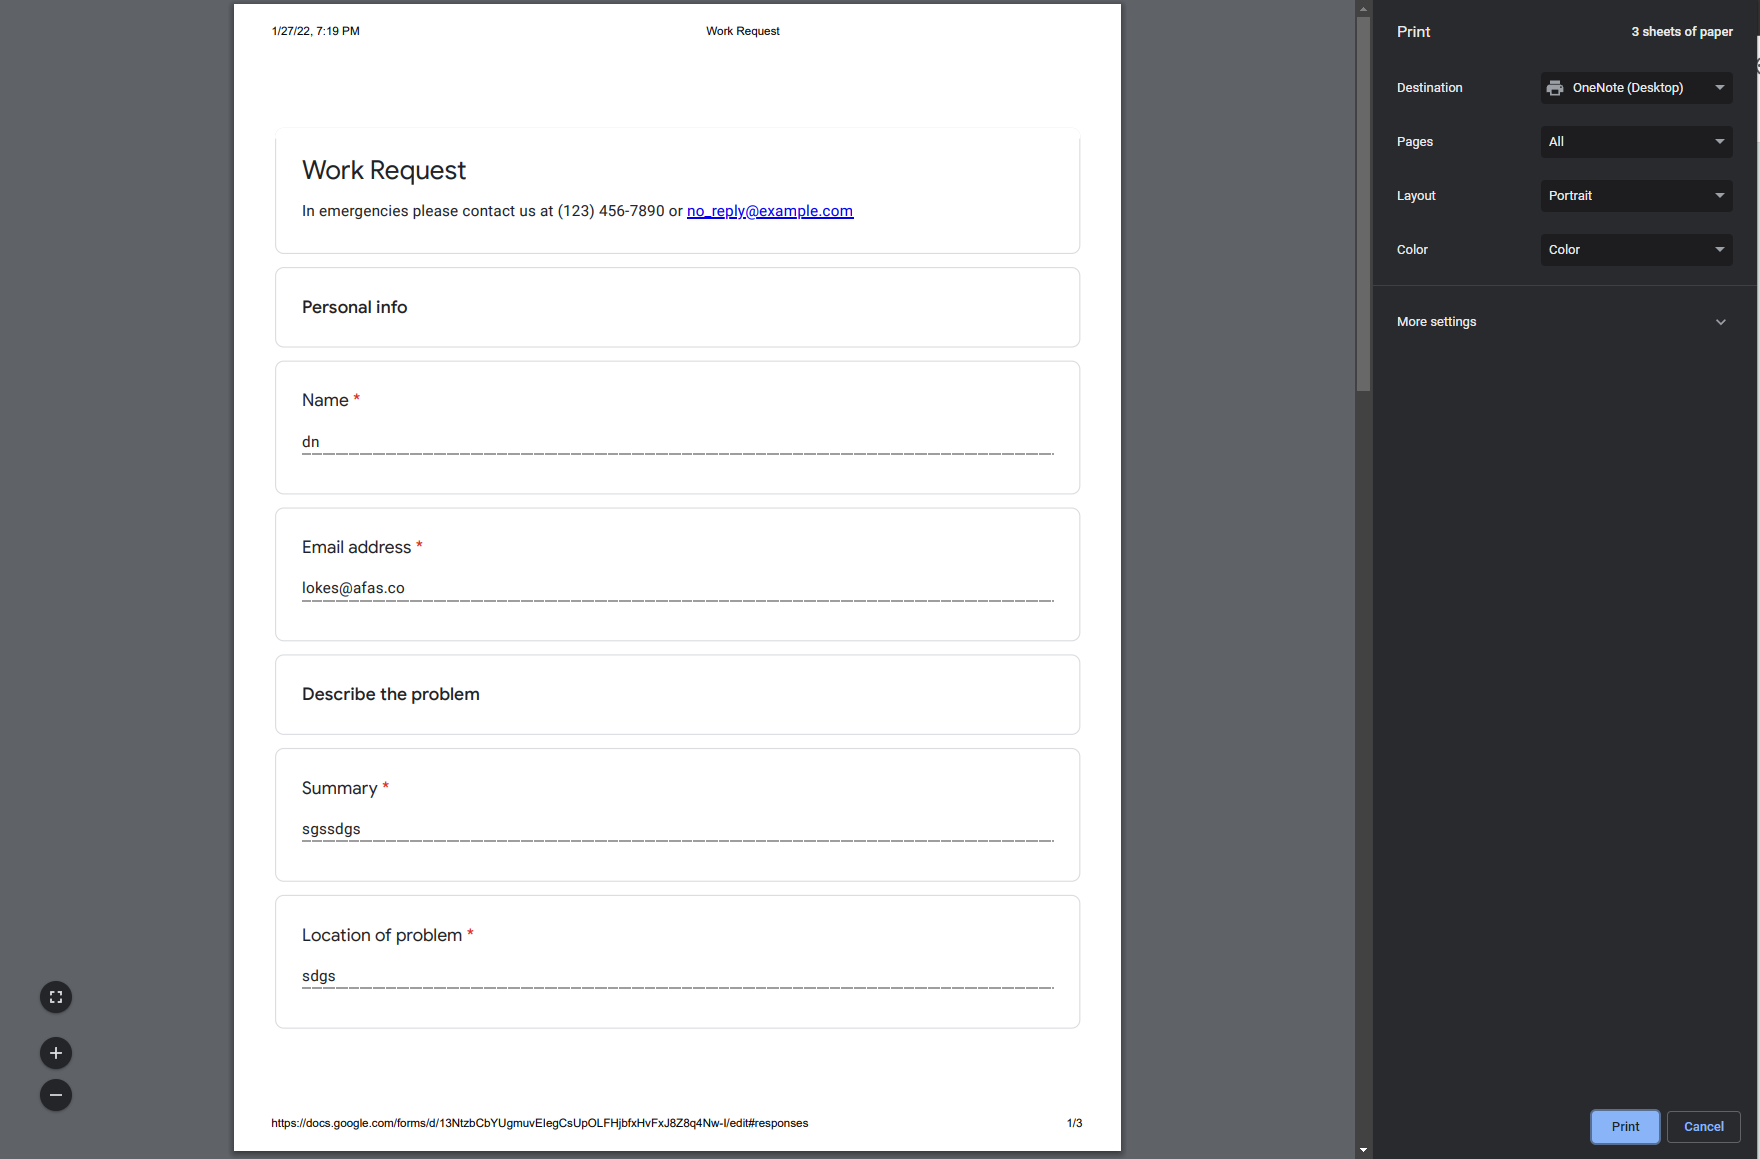
Step 3: Now click on “Print” from the options in the dropdown menu.
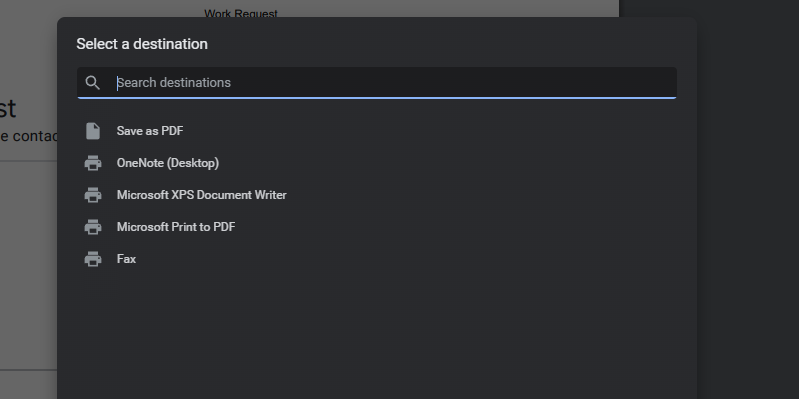
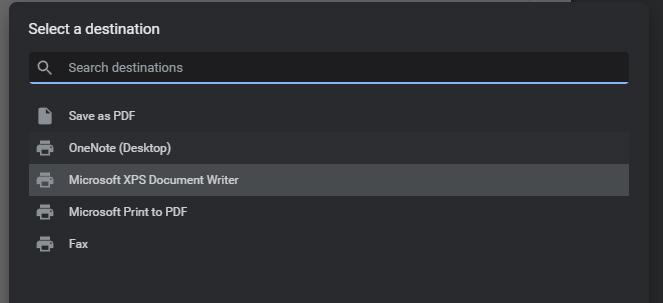
Step 4: Select the printer as the destination you want to use. If your printer is missing, click the drop-down and see more. Sometimes the default will be “Save as PDF” or another destination for your last print.
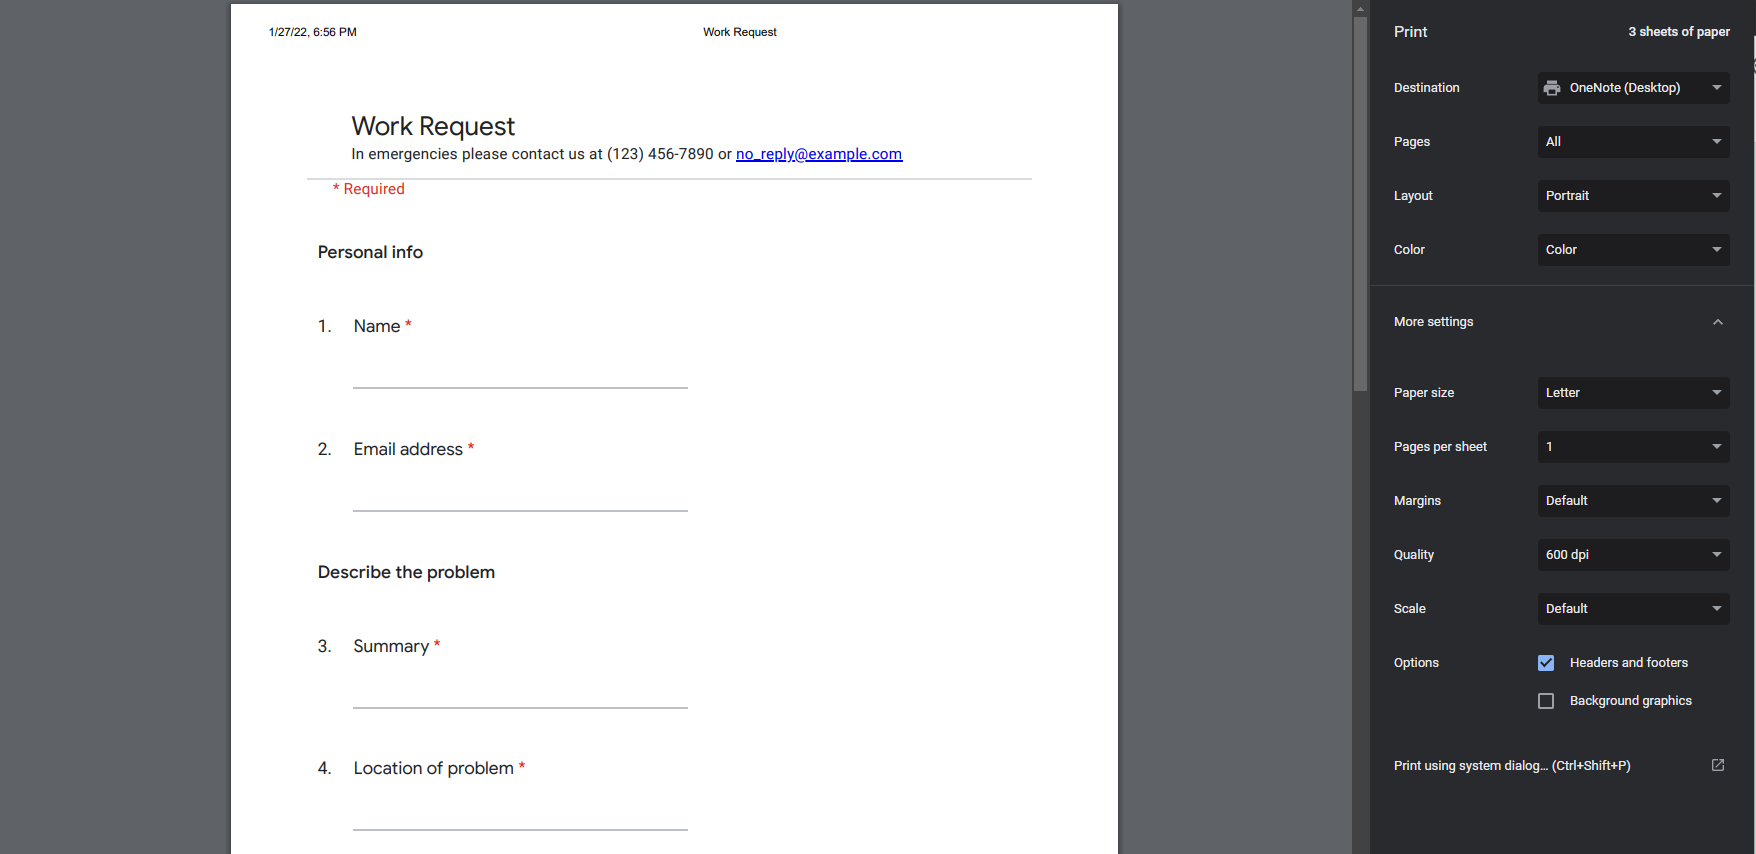
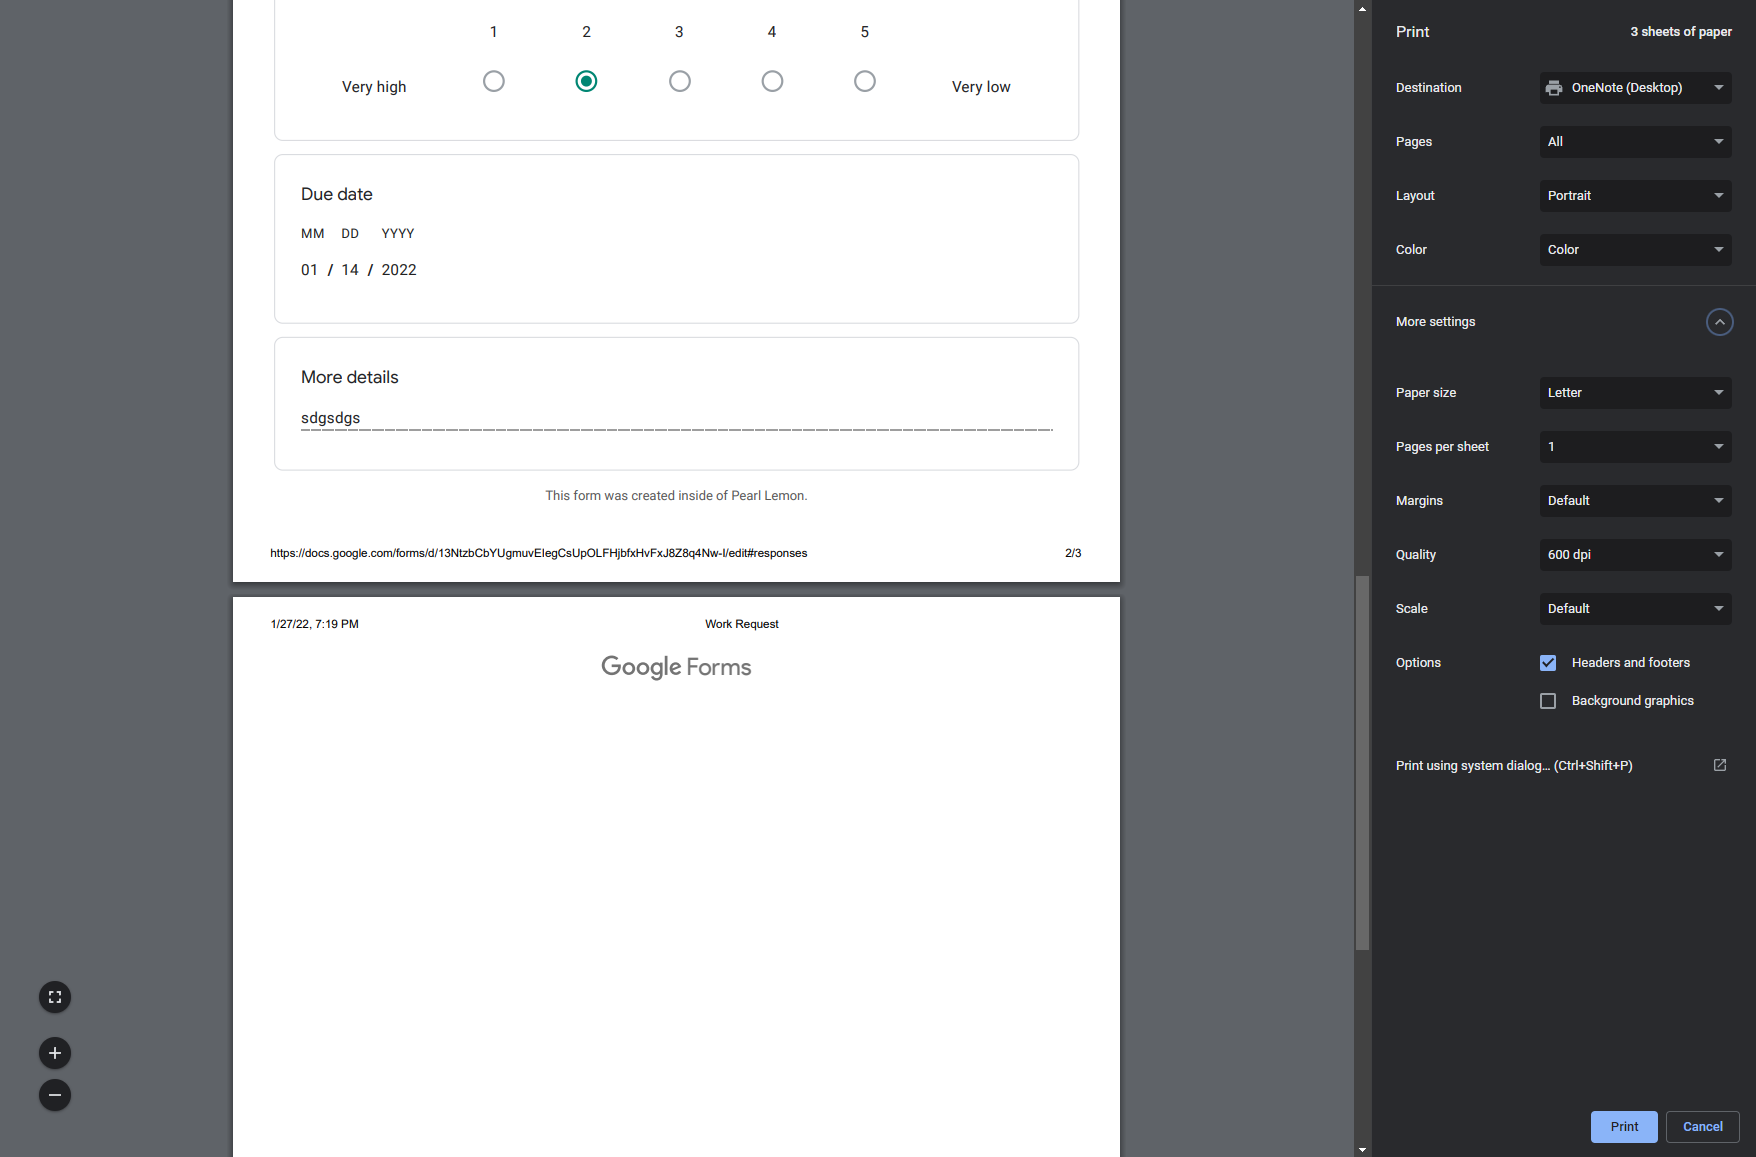
Step 5: Ensure you have checked the page, layout and colour settings. You can also click “More Settings” for other available options.
Step 6: Click on Print.
Printing Individual Responses for your Form
All responses can easily be printed in their original form and show the complete forms of each response.
Step 1: Go to Google Forms and follow the on-screen instructions to sign in using your Gmail account. Make sure you use the same login info you used to create the form.
Step 2: Once you log in, go to the form containing the responses you need to print. Click on the Google form you want to print. You can find it under “Recent forms” or select it from your created folder.
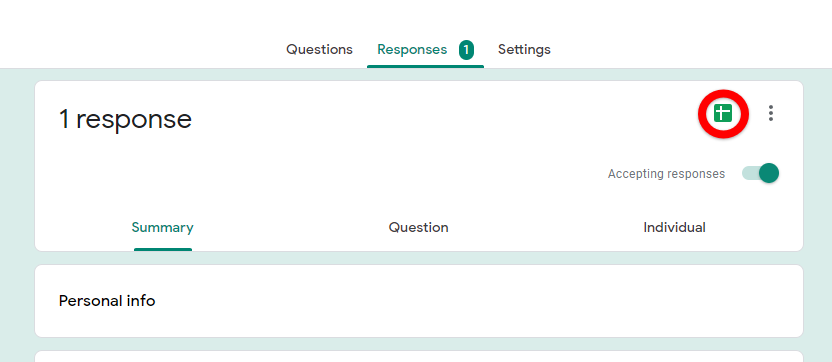
Step 3: Click “Responses” on top of the form after the questions.

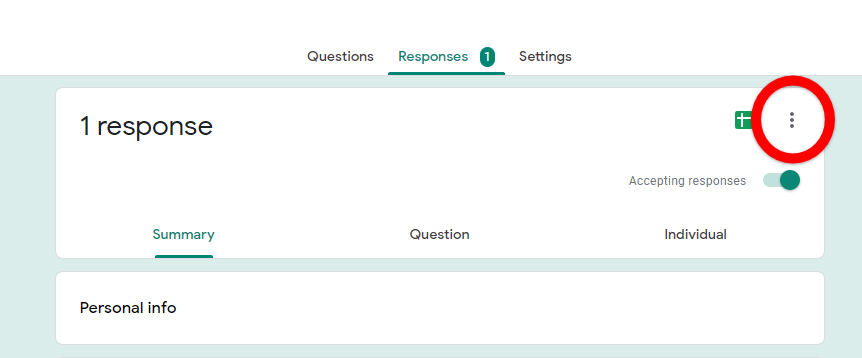
Step 4: Click on the three dots at the top right of the interface. The options menu in the first section displays how many responses are in each subsection.
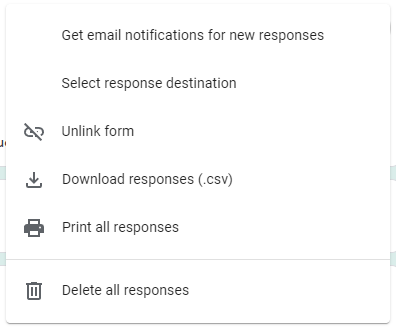
Step 5: Select Print all responses.
This will launch a preview in a new browser tab or window, and a print window will automatically pop up.
Step 4: Select the printer as the destination you want to use. If your printer is missing, click the drop-down and click “See more”. Sometimes the default will be set as “Save as PDF” or another destination set for you in the last print.
Step 5: Make sure that you have checked the page, layout and colour settings. You can also click “More Settings” for other available options.
Step 6: Click on Print.
Printing Responses in Table from Google Sheets
If you prefer to see all the responses in a table format, you can export them to a Google Sheets printout instead.
Step 1: Go to Google Forms and follow the on-screen instructions to sign in using your Gmail account. Make sure you use the same login info you used to create the form.
Step 2: Once you log in, go to the form containing the responses you need to print. You can find it under “Recent forms” or select it from a folder you created.
Step 3: Click on the Google form you want to print.
Step 4: Click “Responses” on top of the form after the questions.
Step 5: Click on the Google Sheets icon in the top right. This is a green icon with two intersecting white lines. The response Google sheet will open in a new browser tab.
Step 6: Click on the print icon. To print the sheet, you can also hit Ctrl+P for Windows or Command+P for MacOS.
Step 7: Format Google Sheet as your desired table format. You can change the font style and font colour or draw borders around a table by clicking on the format settings button at the top toolbar in Google Sheets. Ensure all the printer settings are correct such as the page size and margins and click next.
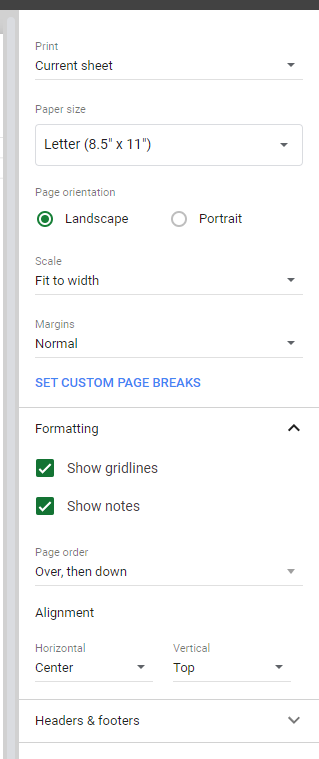
Step 8: Now, select the printer as the destination you want to use. If your printer is missing, click the drop-down and click “See more”. Sometimes the default will be set as “Save as PDF” or another destination set for you in the last print.
Step 9: Printer settings will be set, similar to the previous one. Double-check the pages, layout and colour from the settings. You can also click “More Settings” for other available options.
Step 10: Click on Print.