Google Forms is a free online application that enables users to make forms, surveys, and quizzes. Users can update the forms together and share them with others. Teachers can use Google forms to evaluate their students at the start of the lesson and determine prior knowledge. Google forms can also be used to give feedback.
Similarly, students can use Google forms to evaluate their learning, establish learning objectives, and gather information for research projects. Its functionality depends on how well a person generates and communicates its link. This article provides specific ways to distribute Google Forms through its link.
Using Google Forms
To create, view, and share material on Google Forms, you must be signed in to Google. Google offers users various pre-made templates, such as RSVPs, party invitations, event feedback, and course review. You should use the blank template if you want to create your own Google form.
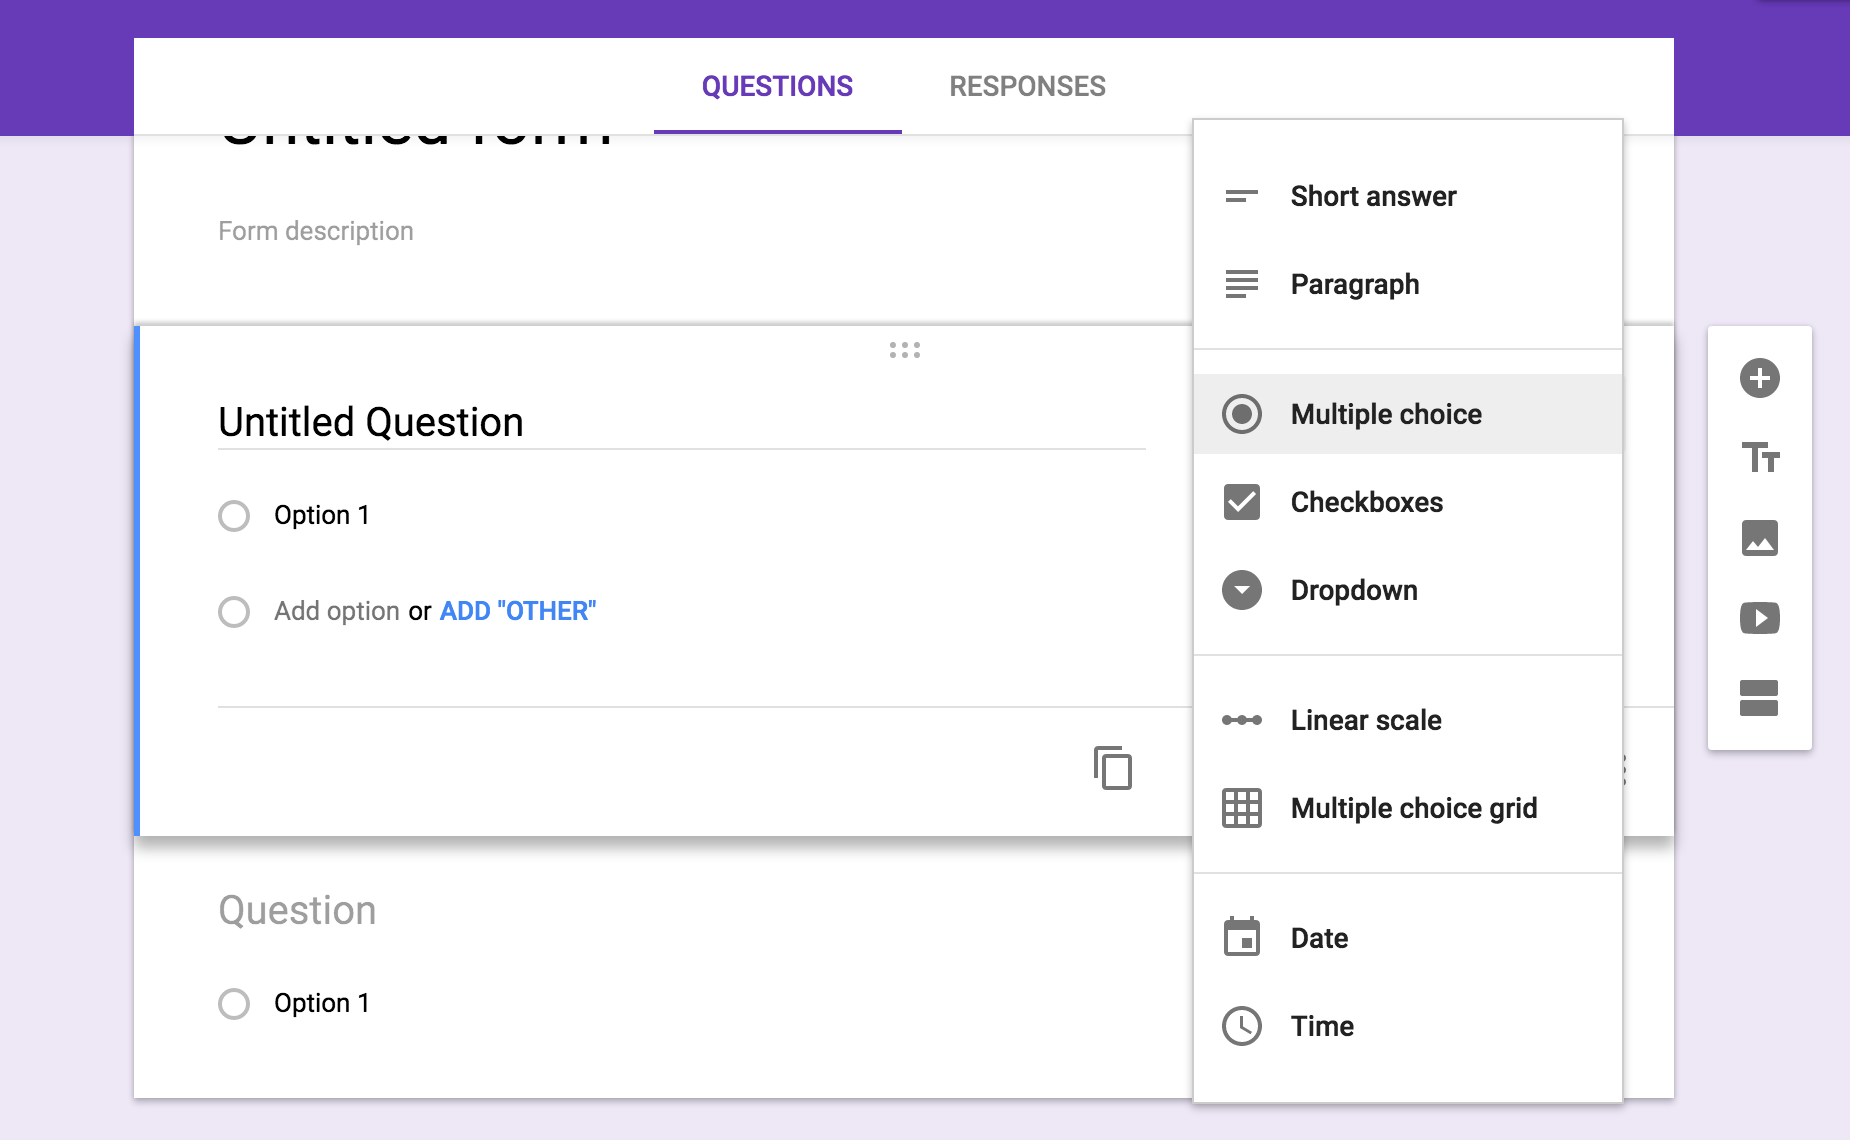
You can include many other questions in a Google Form, such as checkboxes, dropdown menus, multiple-choice grids, checkboxes, paragraph responses, and multiple-choice questions. Images and videos can be easily included in a form, which is a terrific approach to gauging what students learn and think after seeing the media. You can also include an upload tool for students to upload their work.
Further research is possible thanks to the collection of Google Forms data in a Google Spreadsheet. Additionally, Google Forms provides a “summary of responses” function that visualises answers to closed-ended questions (e.g., multiple choice, checkbox). Users can use Google forms to be embedded, linked to, and emailed, making it simple to share the findings with others (see Using Google Forms).
How to Create Google Form?
The importance of creating a Google form is not just limited to the fact that it can be used for gathering data and sending it to your clients. Important as well is that it can be used as a tool in marketing your business. Learn how to create a Google Form using the steps below easily!
- To fill out a form, go to https://www.google.com/forms
- Register for a Google account by clicking “Go to Google Forms.“
- Sign in to Google Forms
- At the top right of the page, click “Google Apps” and “Drive.”
- At the top left corner of the Google Drive page, click the “New” button
- Click on “More” in the drop-down menu
- Lastly, click “Google Forms” on the popup menu
Send out your form
If you share Google forms with a:
- Personal account: The form can be accessed by anyone with the link.
- Workspace account: The form can be restricted to your organisation or made available to all users.
After you create a form, you can:
- You can send it via e-mail or social media.
- Add it to a website.
Step 1: Check form settings
Be sure to customise your settings before sending your form.
One response per user is allowed
- Use Google Forms to open a form.
- Click Settings at the top of the form.
- You can find “Responses” by clicking the Down arrow next to it.
- Limit responses to one.
Users must sign in to their Google Account to access and complete the form. Users’ usernames will not be recorded unless you enable the “Responses” setting.
Editable responses should be allowed.
If someone has already submitted a response, you can choose whether they can edit it.
- Use Google Forms to open a form.
- Click Settings at the top of the form.
- You can find “Responses” by clicking the Down arrow next to it.
- Activate the Allow response editing option.
Provide a summary of responses
When someone fills out your form, they receive a link to the results. Anyone who can respond to the form can view response summaries that contain full-text responses and charts for each question.
- Use Google Forms to open a form.
- Click Settings at the top of the form.
- Click the Down arrow next to “Presentation.”
- Activate View results summary. Respondents receive a summary of the results.
Change confirmation message
After people submit the form, you can customise the message they receive.
- Use Google Forms to open a form.
- Click Settings at the top of the form.
- Click the Down arrow next to “Presentation.”
- Click Edit next to “Confirmation message.”
- Enter your message.
- Then click Save.
Step 2: Send the form
Send a form by email
- In Google Forms, open a form.
- Click Send in the top right corner.
- Please add the email addresses along with the subject and message you would like the form sent.
- Then click Send.
You cannot check the box next to “Include form in an email” when you send a form that includes a file upload question.
Get a link to the form.
You can share a link to a form through a chat or email.
- In Google Forms, open a form.
- Click Send in the top right corner.
- Click the link at the top of the window.
- You can copy the link by clicking Copy or pressing Ctrl + C (Windows).
Share a form on social media
- In Google Forms, open a form.
- Click Send in the top right corner.
- Choose Twitter or Facebook from the top right corner.
- To share the form, follow the instructions.
Send a form with pre-filled answers.
Respondents can be sent a form already filled out in some fields.
- In Google Forms, open a form.
- Click More in the top right corner.
- Click Get pre-filled link.
- Pre-populate any answer fields, you wish.
- Get the link by clicking Get link.
- The link at the top can be copied and sent to respondents to pre-populate the form.
Embed a form on a website
- In Google Forms, open a form.
- Click Send in the top right corner.
- Click Embed at the top of the window.
- The HTML that appears can be copied by clicking Copy or pressing Ctrl + C (Windows).
- Copy and paste the HTML code into your website or blog.
Conclusion
The solid form can be shared in multiple ways using Google forms. Providing a link to people is the simplest way. In the top right of your form, click the blue “Send to” button to obtain the link. The link provided should be copied and pasted where your audience will be able to access it (Email, Edmodo, Webpage, etc.). Shorter URLs can also be selected, allowing users to type the URL directly.
FAQ
Do links work on Google Forms?
If you want to display a link on your form, insert it in the description field after creating it. The raw URL can only be pasted in the description field of Google Forms. It will be automatically recognised by Google and published as a live link.
What is the use of the pre-filled link in Google Forms?
By clicking a link to a Google Form, a pre-filled link will pre-fill some of the answers. In the upper right corner, click on the three dots menu and choose “Get a pre-filled link.” A preview of the Google Form will appear. Choose which fields you want to pre-fill.
Do links to Google Forms expire?
Any quiz, poll or survey created inside Google Forms has no expiration date, and it can collect an unlimited number of responses until the form owner decides to close* the form manually. For some Google Forms, though, limits may be necessary.